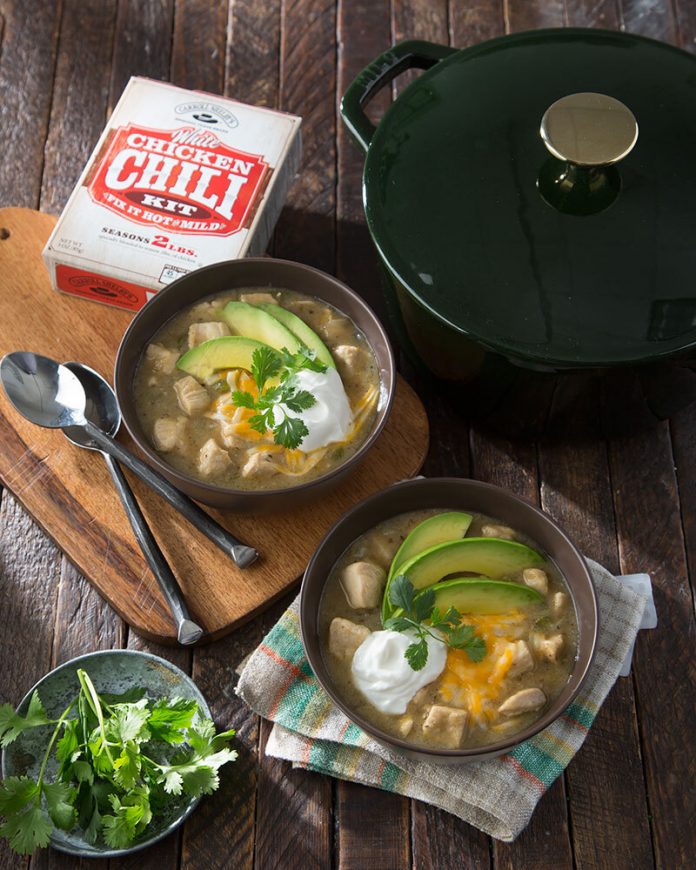
As the summer heat fades and we head into the glorious days of autumn, we welcome the return of one of our favorite cool-weather foods: chili. From its signature spice that seems to warm us from within to its simplicity, chili is one of those dishes that is well-loved by everyone, and thanks to Carroll Shelby’s customizable chili kits, perfecting your pot of chili for an at-home get-together just got a lot easier. No matter if you like your chili extra spicy or prefer a milder mix, these flavorful kits, which include individual packets of spices, cayenne, and masa flour, allow you to customize your chili anyway you like it. This fall’s tailgates may look a bit different than years past, but rest assured, you can bring the party home with a DIY chili bar, and we’re going to show you how. With these helpful hints and our knockout White Chicken Chili recipe, your chili bar will be a hit.
Make it ahead
When guests arrive, the last place you want to be is standing over a stove. Thankfully, chili is one of the simplest make-ahead meals there is, especially when using Carroll Shelby’s chili mixes. Start your chili several hours before party time and keep it simmering on your stovetop until it’s time to serve. If you’re short on time day of, you can even make it an entire day ahead and simply reheat before serving.
Keep it hot
No one likes a cold bowl of chili, so when it comes to a chili bar, you want to make sure everyone, from the first guest to the last, is served a piping hot bowl. One of our favorite tricks for keeping food warmer for longer is cooking and serving in an enameled Dutch oven. These thick-walled cast-iron pots are renowned for holding in heat. Plus, they come in an array of beautiful colors so they can go from stove-top to serving table beautifully.
Master your setup
Make a checklist of the items you’ll need for the perfect chili bar beforehand. Choose your cooking pot, gather plenty of bowls—both for serving the chili and smaller ones for displaying toppings—and don’t forget the utensils. You’ll need a ladle for serving the chili, spoons for eating, and more spoons for each bowl of toppings. Add lots of napkins and you’re set.
If you plan for your guests to go through a self-serve line, place the bowls on the left side of serving space, followed by the pot of chili next to them, and continuing to the right with your display of toppings. Drop the spoons and napkins toward the end of your serving space for guests to grab as they finish fixing their bowls. Creating small stations helps keep the line moving quickly and seamlessly.
Don’t skimp on the toppings
A chili bar is only as great as the number of toppings available. Begin with the classics—sour cream and shredded cheese—then let your taste buds take control. For our White Chicken Chili, we love adding sliced avocado and fresh cilantro to the mix. Other delicious options include diced red onion, corn or tortilla chips, crumbled cornbread, and sliced jalapeño and hot sauce for those who like chili with a kick.
- 4 tablespoons olive oil, divided
- 2 pounds boneless skinless chicken breast, cut into ½-inch cubes
- 1 cup diced yellow onion
- 1 cup diced green bell pepper
- 3 cups water
- 1 package Carroll Shelby’s® White Chicken Chili Kit
- Sliced avocado, sour cream, shredded Colby-Jack cheese blend and fresh cilantro, for serving
- HEAT 2 tablespoons oil in a 4-quart Dutch oven over medium-high heat. Working in batches, brown chicken, stirring occasionally, 2 to 3 minutes. Remove chicken using a slotted spoon.
- ADD remaining 2 tablespoons oil and onion and bell pepper. Cook, stirring occasionally, until softened and starting to brown at the edges, 7 to 10 minutes.
- ADD water, spice packet, masa packet, and jalapeño and bell pepper packet, stirring to combine. Return browned chicken to pan; bring mixture to a boil over medium-high heat. Reduce heat to medium-low. Cover and simmer for 15 minutes.
- UNCOVER and continue to simmer on low to medium heat for an additional 15 minutes or until chili has a thicker consistency. To fix it mild, omit cayenne pepper. To fix it hot, stir in cayenne pepper packet to desired taste. Serve with avocado, sour cream, cheese and cilantro.


